
Table of Contents
There is nothing more frustrating than having your instrument develop issues. In some cases, there are some issues that just make it downright uncomfortable to play. Sharp guitar frets are one of those things that can’t be ignored. They basically prevent you from playing it altogether.
Until you learn how to remove sharp edges from frets, there is always a chance that damage could result!
There are two ways to remove sharp edges from your guitar frets. The preferred method is to restore proper moisture to the wood of your guitar and have it expand. The second way to fix fret sprout is to file them down and smooth them out.
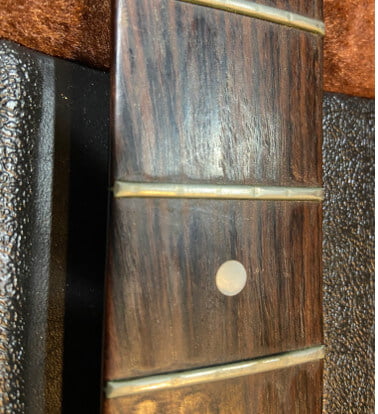
How To Remove Sharp Edges From Guitar Frets
Adding moisture to your guitar takes time and the right equipment. But this means that it will likely be unplayable for a while if the frets are too sharp.
Filing them is much quicker, but there is the chance of damaging the finish if not done right. Filing the frets also means they might be too short. This is if the neck expands naturally with seasonal changes.
What Causes Sharp Frets?
When you begin to realize, the frets are sharp or stick out from the neck farther than they used to. It’s normally pretty bad. This is how it goes for all players who begin to experience this issue. There are a few reasons why this happens.
Hygroscopic Material
The frets are metal and will never shrink or expand normally, at least not any faster than the neck. The neck itself, being made of wood and a hygroscopic material, can shrink and expand by quite a bit. If the guitar is stored in a dry environment for a long period of time, the moisture in the wood will be removed.
As the moisture leaves the wood, it shrinks. The one place you will notice this the most on a guitar is in the neck. As the wooden neck shrinks, the frets will slowly begin to stick out a bit farther than they did before.
Some frets can be so sharp that they can cut your hands as you run past them. In most cases, they are annoying and prevent you from moving quickly as you play. But it can get so bad that the guitar essentially becomes unplayable. If you have ever experienced this, you know exactly what I mean.
To truly know that your neck has shrunk, inspect all the frets. If they are all sticking out, right down the neck, then you know it is because the wood has shrunk. You will need to learn how to remove sharp edges from guitar frets.
Fret Sprout
Raised fret ends, also called fret sprout, are another reason why they might be like a razor. Sometimes the frets loosen or get pushed up. When they loosen, they become sharp and sometimes cut your hand. This is normally also followed with a fret buzz that wasn’t there before.
Not only is the fret end sharp, but it also comes with a funny buzz when playing. This can be fixed quite easily and will only be one or two frets at most that are like this.
Manufacturing Defect
If the guitar is new or has recently had new frets put on the neck, there is always the chance that the ends will be sharp. If this is the case, then it is due to incorrectly filed fret ends. While this doesn’t happen often, it can and needs to be considered.
It’s less likely to happen with a new fret installation. It’s more likely to happen when buying new, cheaper guitars. And just like we touched on above, it is also possible to have frets loosen up. If they were not installed right, they can loosen up and begin to cause issues.
In this case, it is always best to return to the music store or technician to have the issue looked at and resolved.
Fret Ends Sticking out
Sharp fret ends can be fixed, but there are right and wrong ways to do so, especially in the case of the neck shrinking. In order to properly fix a guitar with frets wider than the neck, we need to restore the moisture to the wood.
This is a process that can take a few weeks to do, but it is the best way to go about it. Once the moisture has been returned to the wood, the frets will once again fit as they should. They will no longer be sharp or stick out.
The other way to fix them, which is much quicker, is to file the fret ends down until they no longer protrude from the neck. This is done with a fret end dressing file.
The only issue is that if the neck absorbs moisture later on and expands, the frets will then be too short. There are areas of the world that get very cold in the winter and very hot in the summer.
The humidity levels change so drastically that the guitar changes with the seasons. And so if you live in an environment like this, filing the frets down after the wood has shrunk is not the best fix. It is best to learn how to remove sharp edges from guitar frets properly.
Filing The Fret Ends
This next method is for those who want to resolve the issue now, or for those who have sharp fret ends and no shrinking. Let’s face it, the guitar frets are metal and can become damaged and pointed as well.
In this case, we suggest you either take the instrument to a local guitar tech or obtain fret end files. A tech will be able to address the frets and make them smooth and easy to play. For all you know, it might be time for a refret!
Obtain A Fret End File
If you are a DIY kind of person, fret files are easy to get. This also allows you to get better at performing your own guitar maintenance. Which are good skills to have! Especially learning how to remove sharp edges from frets. Stewmac makes a great fret end file that every player should have anyway.
If at some point they become sharp because of damage or form a burr, you can resolve it yourself. Be sure to keep a file cleaning card to remove the material if doing some heavy fret removal. The file may get gummed up and will need to be cleaned.
Filing Fret Ends Without Damaging Finish
When it comes to filing ends, great care must be taken to prevent damaging your fretboard. It is easy to put a nick into the board when filing frets. So before you begin to file the fret ends, get a hold of some low-tack painter’s tape. Then cover the areas that could get damaged around them.
Even the most steady of hands can leave a nick in the fretboard. And once it is in there, and the damage is done, it is not coming out easy!
Restoring Without Filing
When restoring the wood to its original condition, you need to first address the room it is being stored in. Follow these 3 steps, and you will restore your guitar back to its original condition. This will also prevent it from happening again!
Step 1: Guitar Room Moisture
The first step in fixing the issue of a shrunken neck wood is to get a good humidifier. Every player should be storing their instruments in a room with proper humidity. Just as a rule of thumb. If not, your guitars will be affected in other areas like intonation and tuning.
Not to mention neck action and playability. A properly monitored and adjusted room will also contain a hygrometer. This is used to measure the humidity levels in the room.
A hygrometer will measure both temperature and humidity. Then calculate if the environment is dry, comfortable, or too moist. In order to read the humidity of the room your guitars are stored in, we recommend this device. They are cheap but effective!
Step 2: Proper Storage
You have now added a humidifier to your room. But you will also need to make sure the instrument is stored properly. The best way to do this and add moisture to the wood is to store the guitar in the case. Also, with a proper humidity control system. D’addario makes a great humidity control system. It goes into the case and prevents the guitar from experiencing dryness.
The restore kit revitalizes dried-out instruments. In this case, the wood has already shrunk. So this helps reapply moisture to get it back to normal quicker.
The humidifier in the room will help a great deal in preventing it from shrinking again. Getting back to normal will require letting it sit with proper humidity in the case.
Step 3: Give It time and Monitor
The next step is the hardest, you need to wait and monitor the fix. For some players, the fret ends are so sharp that the guitar cannot be played. If this is you, then make sure the restore system by Daddario is being used and give it a good week.
Depending on the wood, it may only be a few days before you are at least able to play it. But expect a few weeks to be restored completely.
Continue to keep the humidity in the room up to at least 35% and store the guitar in its case when not in use. Between the added humidity to the room and the system installed in the case, you will be back in action in no time!
While you may also be looking for quicker options, just be careful with adding too much water too soon. You don’t want to ruin the guitar or the wood by doing this too quickly. But by using these steps, you will be in good shape.
FAQs
How Do You Get Rid Of Sharp Edges On Frets?
When your frets have formed some nasty sharp spots and are not a result of neck wood shrinking, then a file is needed.
Just like we mentioned above, you can take your guitar to a tech for some maintenance, but in this case, you may want to DIY! It can be a real benefit to learn how to remove sharp edges from guitar frets.
Once you have taped the area around the fret that needs work, proceed to find out what is pointed. In most cases, the beveled end has a sharp edge. Using the fret file, you want to lightly remove the edge.
Don’t dig in too deep with the file, it can remove a lot of material in one stroke and wear it away. Gently file the sharp edge until you no longer feel it.
How do you round off guitar frets?
This is a procedure that molds the fret edges to be as close to the board as possible. This prevents your hand from ever catching on the frets when playing.
In order to do this, the frets need to be filed so that they are round on the ends. It takes time to work them round to eliminate any square or pointy ends.
Once it is round, any burr edges need to be removed by using a flat file to prevent harming the fretboard. With some patience, anyone can perform this service.
