Table of Contents
If you are new to the guitar and are trying to figure out how all the amplifier controls work, it can be overwhelming. Some amplifiers have a lot of controls that do many different things.
Others are more basic but have different terms used to describe what the guitar amp controls do. Switching from one amp to another will more than likely present a learning curve and require time to get used to the controls.
In this Killer Rig guide, we are going to look at the many amp controls you will come across on models that are available today. We will also look at what they do and how you can use them to get the right amp settings for your style.
The Basic Controls
Understanding the fundamental controls of a guitar amplifier is crucial for any guitarist, it doesn’t matter if you’re a professional player or a newbie just getting the hang of things.
Before diving into the intricate settings and EQs, let’s get a grip on the basic switches that power up your amp and set the stage for your sound.
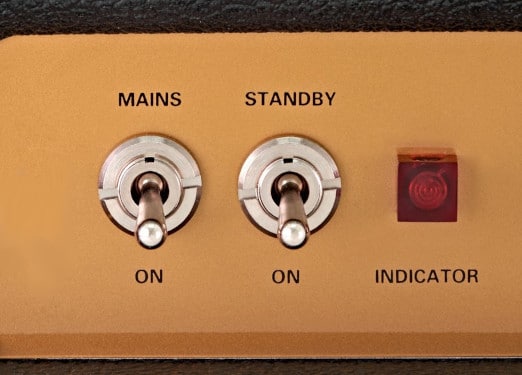
Power Switch
The power switch, as the name suggests, turns your amplifier on and off. It’s the primary control that brings your amp to life, allowing the electrical current to flow through and produce sound.
This control is always well-marked and is normally found on the front, or top, of the amplifier.
Some manufacturers place them on the rear, but this is quite rare and is only done when they just simply cannot fit them on the front. There is always an indicator light that turns on to help you understand when the amplifier has been powered.
Standby Switch
The standby switch acts as a secondary power control, allowing the tubes in a tube amplifier to warm up without sending the full voltage through them.
This helps prolong the life of the tubes and ensures they’re at optimal performance when you’re ready to play.
How to Use Safely:
- When powering up your amp, turn on the power switch first and let it sit for a minute. Then, flip the standby switch to activate the tubes.
- Before turning off the amp, put it back in standby mode for a minute, then turn off the power.
Channel Switches
Channel selection is a pivotal aspect of modern amplifiers, allowing guitarists to switch between different tones and gain structures at the flick of a switch.
Whether you’re aiming for a clean, jazzy tone or a high-gain metal roar, understanding channel selection can elevate your sound to new heights.
How Channel Selectors Work
At its core, a channel selector is a switch that allows you to transition between different pre-set tones on your amplifier.
Each channel has its own set of controls, such as volume, gain, and EQ, enabling you to customize and save multiple sounds.
When you switch channels, you’re essentially moving from one set of controls to another, instantly changing your tone.
While many traditional amplifiers come with one or two channels (typically clean and overdrive), modern models have expanded this offering. Some high-end amplifiers, like the Revv Generator, boast up to four channels.
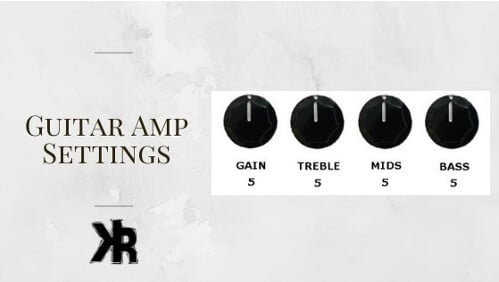
Gain
The gain knob is one of the most important guitar amp settings you will use. It adjusts the level of distortion in your sound. If you have the gain set too low, your tone will be cleaner with little to no distortion.
If you have the gain set too high, your sound will be very distorted and saturated, which may not be good with some amps. Not every amp has the same potential to produce distortion, and so for some, this isn’t an issue.
On amplifiers that are lower in gain, this control might be referred to as “drive”. And so if you have an amplifier with this term, it will also alter the distortion level in the same manner.
Treble Control
The treble control adjusts the high-frequency range of your guitar’s sound. By turning this knob, you can either amplify or reduce the bright tones of your instrument.
Finding the Right Treble Setting
While a bright sound has its advantages, it’s essential to find a balance. Too much treble can make your sound harsh.
- Lead vs. Rhythm: Lead guitar parts, like solos, often benefit from more treble to stand out. In contrast, rhythm parts usually lean towards a warmer tone to blend with other instruments.
- Genre Matters: Different music styles have varied treble preferences. For example, jazz might favor a softer tone, while rock or metal might lean towards more treble for that sharp edge.
Remember, the treble control is just one tool to shape your sound. Experiment with it in conjunction with other controls to find your perfect tone.
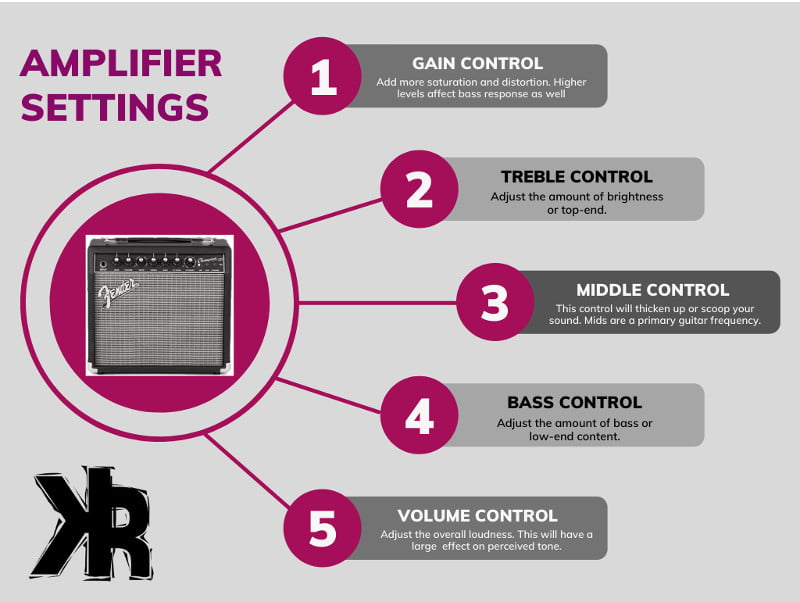
Middle
The middle control, often labeled as “Mids” on some amplifiers, fine-tunes the midrange frequencies of your guitar’s sound. This range is crucial as it directly influences how your guitar blends with other instruments and how it feels in terms of fullness and depth.
Advantages of a Boosted Middle Setting
- Sitting Well in a Mix: A pronounced midrange can ensure your guitar holds its own, especially when played alongside bright instruments like cymbals or keyboards.
- Fuller Tone: The midrange frequencies are the heart of your guitar’s sound. Boosting them can make your tone richer and more robust, filling out the space.
Bass
The bass control changes the perception of low frequencies from your amp. The benefit of having a higher bass setting is that it can help to fill out the low end of your guitar’s sound.
It can also make the amp sound larger or have more depth than it would with a lower setting. Be careful not to overdo it, too much bass can make the guitar tone muddy. This means the tone will lack clarity and can make a guitar sound dull and lifeless.
It’s important to use this control in conjunction with the amount of gain added. This is important to keep clarity and maintain a good tone.
Tone Control
Tone controls are usually found on lower gain amplifiers. They typically take the place of the treble, mid, and bass controls. This allows you to dial in your desired tone with one knob.
These are pretty basic amplifiers, only having 3 -4 controls. But are easy to adjust and don’t need much to make them sound good!
Volume
The volume knob is just what it sounds like; it adjusts how loud your guitar will be through the amplifier. While some will say that you should adjust this last, that is not the best way to proceed.
It’s always best to adjust your EQ with the volume turned up to your preferred level. This way, the other frequencies can be heard and adjusted at this level.
If you do it last, some frequencies might become overwhelming when volume is turned up. You may have to start over again.
Sometimes you will also see this control called “Master“. In the case of some amplifiers, you may even have 2 masters. They will allow you to switch between them for different volume levels. This can be great when a solo needs to be louder.
Guitar Amp Effect Controls
Sometimes guitar amplifiers will come equipped with effects built into them. These are usually things like:
- Reverb
- Delay
- Chorus
- Tremolo
- Phaser
In some cases, there are others, but these are the most common effects and the ones we will look at setting up on your amp.
Reverb
Reverb is an essential effect that replicates the natural echo you’d hear in various spaces. Depending on its type and settings, reverb can be a subtle ambiance enhancer or a pronounced, transformative effect.
Here’s a breakdown of the common reverb types found in amplifiers:
- Spring Reverb: Predominantly found in tube amps, spring reverb utilizes a physical spring tank. The guitar signal is channeled through these springs, resulting in the characteristic “wobble” sound. It’s a classic effect that’s been a staple in many iconic recordings.
- Plate Reverb: This type offers a denser, smoother reverberation. It simulates the sound produced when vibrations are sent through a large metal plate. The resulting sound waves are closely packed, giving a brighter, more consistent echo.
- Hall Reverb: As the name suggests, hall reverb replicates the expansive echoes of a large hall or auditorium. It provides a broad, natural-sounding reverb that can add depth and dimension to your sound.
- Room Reverb: This type emulates the more contained reverberations of a smaller space. It’s subtler than hall reverb but can add a touch of warmth and realism to your tone.
When adjusting reverb, it’s often best to start with modest settings. A little reverb can go a long way in shaping your sound.
Delay
Delay also creates an echo-like effect. Unlike reverb, it can be very pronounced and last for long periods. This can be a great effect on solos and lead playing.
It can be used to create different textures and sounds in your guitar playing. Different types of delays come with amplifiers such as:
- Digital delays are the most common and are very versatile. They can be set for long or short delay times and have a very clear sound.
- Analog delays are not as common but still offer a great tone. They can sometimes be a bit noisier than digital delays.
Again, it all comes down to what you are going for with your sound. Try different settings and see what you like best.
Chorus
Chorus is an effect that takes your signal and splits it into two. These signals are then slightly out of phase with each other, which gives the chorus its sound.
This effect can add depth to your tone. It uses two signals of similar intensity to overlap at certain intervals.
Tremolo
Tremolo is an effect that modulates the amplitude of your signal. This gives the impression that the sound is repeating itself. It’s like a tremolo system being used on a guitar. Tremolo can be very effective when used sparingly.
Want to learn how gain and volume are different? Read my article about this here!
Other Preamp Controls
Beyond the foundational knobs, many amplifiers come equipped with additional preamp controls. These knobs and switches offer further customization, allowing you to fine-tune your sound with precision.
However, it’s worth noting that some of these controls might be channel-specific. In multi-channel amplifiers, certain controls might be present on one channel but absent on another, adding to the versatility of the amp.
Here are some of the additional controls you might encounter:
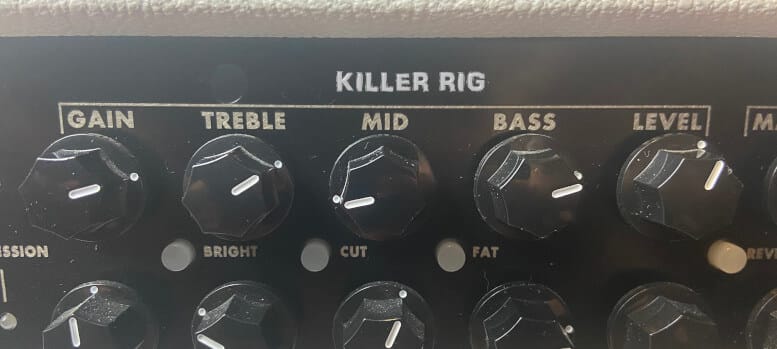
- Bright
- Fat
- Wattage
- Contour
- Boost
- Tone
Further Learning: Electric Guitar Controls Explained.
Bright
The bright switch is a very common control on amplifiers. It can usually be found on many channels of an amp. The purpose of this switch is to add brightness or treble to your tone apart from the other controls.
This is good when using a guitar that has a darker sound. It’s also a good way to brighten things up during a solo or lead section.
Fat
The fat switch is usually found on high-gain channels. Its purpose is to add fullness or depth to your sound by increasing bass content.
Perfect for giving your tone more body. It can also help to fill out the sound of a guitar that is on the thinner side. An example is a Fender Stratocaster with single-coil pickups.
Wattage
The wattage switch is a relatively new feature on amplifiers. It allows you to select the wattage that the amplifier will be running at. For example, an amplifier that is rated at 120 watts can be brought down to 10 and produce less volume.
This can be great for getting different power levels from your amp, but can also offer more sound versatility. You can usually find this switch on the back of the amplifier.
Contour Knob
The contour knob on an amplifier plays a specific role in shaping your sound, specifically targeting the mid-range frequencies. Unlike the middle knob, which adjusts the overall level of midrange, the contour knob shifts which mid-frequencies are emphasized.
For instance, when the contour knob is set to a lower value, it might attenuate frequencies in the 800 to 1000 Hz range.
Conversely, a higher setting will boost these frequencies. This adjustment allows you to either darken or brighten the guitar’s presence in the mix.
The contour control offers a nuanced way to mold your sound. It’s especially useful for achieving that scooped tone favored in heavier music genres, or for adding depth and fullness in other styles.

Boost
The boost switch is primarily found on lead channels of amplifiers. It’s a way of altering the circuit to produce more distortion or overdrive.
This can be great for giving your solos more punch or making them stand out more in a mix. It can also help to tighten up the tone of an amplifier that might be sounding too loose in some circumstances.
Power Amp Controls
The power amp is what takes the signal from the preamp and amplifies it to drive the speakers. This is where a lot of the magic happens in terms of getting your tone. The power amp also has some control over your final sound.
The power section usually has 2 to 4 controls at max, depending on the size and type of amplifier. The most common are:
- Presence
- Resonance or Depth
- Bias
These controls will be different based on the type of amplifier that you have. Solid-state amplifiers might have different controls when compared to others.
Especially when compared to tube amps. But this also depends on the brand and model. But they both serve the same purpose, which is to shape the sound of your amplifier.
Presence Control
The presence control on an amplifier offers a nuanced way to adjust the high frequencies of your sound. Unlike a simple treble knob, the presence control operates through a process involving negative feedback.
Here’s how it works: Signals, which are of the opposite polarity (hence, “negative feedback”), are taken from the speaker output and fed back into a specific circuit within the amplifier. This circuit is designed to modify the sound based on the setting of the presence control.
By adjusting the presence, you’re essentially influencing how much of this negative feedback is applied. This can either boost or attenuate the high frequencies, allowing for a more tailored sound.
Typically, the presence control is located in the power section of the amplifier’s circuit, making it a valuable tool for those looking to achieve a precise tonal balance.
Resonance (Depth) Control
The resonance control, also known as the depth control, is the counterpart to the presence control, focusing on the low frequencies of your sound.
By adjusting this knob, you can add richness and depth to your amplifier’s tone, giving it a more robust and full-bodied feel.
If your guitar’s sound ever feels lacking in warmth or seems too thin, turning up the resonance can make a significant difference. It’s designed to provide that extra punch and thump, ensuring your tone always has a solid foundation.
7 Tips For The Best Settings
Getting a great tone can be difficult, especially if you know what you want. We all have a sound in our heads that we like, but reproducing it is not easy. If you have tried some of our suggested settings, here are some tips that can also help.
- Make sure to use the right pickups. If you are seeking a high-gain sound, single-coil pickups won’t do the job. You also want to make sure you are using the right position. The neck pickup is a warmer, fat tone. This can be a problem if your sound is boomy. Try the Bridge pickup instead.
- Your guitar also has a tone control that can affect your sound. If you are having issues with a bright, harsh sound, try turning down the tone control on your guitar. This setting can play a huge role with the guitar and amplifier. Remember, your guitar is where it all starts, it has to be set right as well.
- If your tone is too thin, try thicker strings. Sometimes this can give you a bigger, fuller sound. Just keep in mind that the thicker they are, the harder they will be to bend.
- Effects will play a big role in how your amplifier settings sound. Sometimes they can add too much fullness or produce funny artifacts. If you are struggling to get a good tone, turn all the effects off and see if it solves the issue. From there, turn each setting down one at a time and see how it responds.
- Give yourself more time and be patient. Sometimes it can take time before you get a great sound. Many guitarists spend hours dialing in their tone before they find what they want. This is normal and can’t be helped with some guitar and amplifier combos.
- If your high-gain tone is just not doing it for you, try a distortion or overdrive pedal. There are some great products on the market that sound just like tube amps. This can and has been the fix for many guitar players.
- When you find your tone, don’t keep tweaking. Leave it and jam on it for a few days. Our ears can get tired and need a break after all the tweaking. If it’s good, then write it down and make sure not to lose your hard work.
If you are not sure what sound you are going for, that’s ok! We have some guides on bands and their settings that can help. Listen to some songs and try and get the same sound.
Conclusion
We all want the perfect sound, but it can be tough to get. With these settings, you can get close and find a great sound that works for you. Just remember that each guitar and amplifier are different.
Some don’t play well together and others are super easy to tweak. These settings are meant to be a guide and not an exact science. Have fun with them and see what works best for you.